Difference between revisions of "Surgery Protocol"
Chrisl1026 (talk | contribs) (→Basic Equipment needed) |
Chrisl1026 (talk | contribs) (→Baseplate Preparation) |
||
| Line 60: | Line 60: | ||
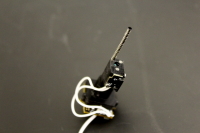
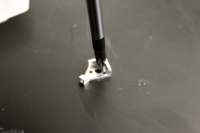
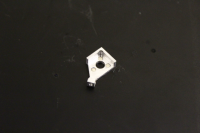
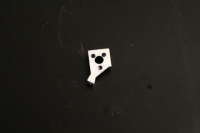
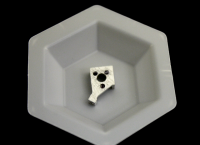
The first step is to insert magnets into the appropriate holes on the baseplate. To ensure that the polarity of the magnets is correct throughout the baseplate preparation, use a reference Miniscope to hold onto the magnets. Mark the top magnet with a sharpie, as seen in the picture to the right. Next, put the top magnet on the head of a screwdriver with the marked side facing away from the screwdriver. Apply cyanoacrylate glue on the edge of the magnet, then push the magnet through the appropriate hole. Ensure that the magnet goes through the hole completely and the top side of the baseplate is flat, as the quality of imaging relies on the Miniscope sitting flush on the baseplate. Repeat this procedure for the next 2 magnets. Finally, put a coat of cyanoacrylate glue on the bottom side of the baseplate and leave the baseplate to dry. | The first step is to insert magnets into the appropriate holes on the baseplate. To ensure that the polarity of the magnets is correct throughout the baseplate preparation, use a reference Miniscope to hold onto the magnets. Mark the top magnet with a sharpie, as seen in the picture to the right. Next, put the top magnet on the head of a screwdriver with the marked side facing away from the screwdriver. Apply cyanoacrylate glue on the edge of the magnet, then push the magnet through the appropriate hole. Ensure that the magnet goes through the hole completely and the top side of the baseplate is flat, as the quality of imaging relies on the Miniscope sitting flush on the baseplate. Repeat this procedure for the next 2 magnets. Finally, put a coat of cyanoacrylate glue on the bottom side of the baseplate and leave the baseplate to dry. | ||
Once the baseplate has dried, score the bottom and the sides of the baseplate using a dental drill to allow the dental glue to adhere the baseplate and skull well. | Once the baseplate has dried, score the bottom and the sides of the baseplate using a dental drill to allow the dental glue to adhere the baseplate and skull well. | ||
| + | |||
| + | <br clear=all> | ||
| + | |||
| + | {{#ev:youtube|https://youtu.be/z_32O2XoYI4|640|center}} | ||
| + | |||
| + | <br clear=all> | ||
=== Cap Preparation === | === Cap Preparation === | ||
Revision as of 20:02, 15 November 2016
The following is a basic outline of our procedure for implanting a GRIN lens above the hippocampus for CA1 imaging. For videos of surgery and baseplating, see the Online Workshop. Also, see the recent Nature Protocols paper from the Stuber Lab (link) that has a very detailed description of the surgery.
In order to image, animals will need to undergo three surgical procedures: a virus injection, a GRIN lens implantation, and baseplate attachment.
Virus Injection
Before implanting the GRIN lens, you will need to inject a fluorescent indicator such as GCaMP6. We have generally used AAV1.Syn.GCaMP6f.WPRE.SV40 from Penn Vector (Item number AV-1-PV2822) and had great success in dorsal CA1. You may also be able to use GCaMP6 transgenic mice, but we have not tested whether any of the newer lines are bright enough to be imaged.
GRIN Lens Implantation
Basic Equipment Needed
You will only need basic surgical equipment to perform GRIN lens implantation surgeries. This includes a mouse stereotax, an isoflurane vaporizor, surgical heat pad, stereo surgical microscope, light source, dental drill, and bead sterilizer. For recommended equipment, see the master parts list.
You will need the following basic tools and supplies: fine forceps, blunt forceps, fine scissors, scalpel and blade, small skull screws, drill bits, cyanoacrylate glue, dental cement, Kwik-Sil, and cortex buffer
Aspirator and Lens Holder
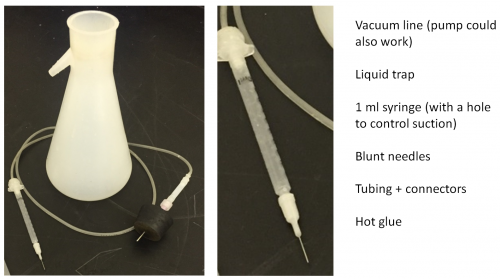
You will need an aspirator to remove cortex above the hippocampus. This can be built very simply with a vacuum line (or pump), a liquid trap, 1 ml syringe (with a hole to control suction), blunt needles, tubing and connectors, and hot glue.
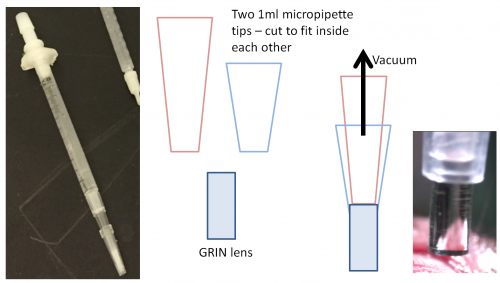
You can easily build a GRIN lens holder by using a suction system to hold the lens in place as it is dropped into the brain for implantation. To build, start with two 1ml micropipette tips. Cut the first so that the tip is just larger than the diameter of the GRIN lens you will be using. Cut the second tip so that the end is just smaller than the size of the GRIN lens. Connect this end to a 1ml syringe and connect to a vacuum line. This will then hold the lens in place during implantation. You can then use tape to attach this holder to a stereotax. Another solution we have used is a basic drill chuck, but this is only good for large (2mm) lenses.
Skull Preparation
You must first prepare the skull for implantation. We recommend shaving the head area and sterilizing with 3 alternating betadine and ethanol scrubs. Next, remove the scalp with scissors and clean the skull with hydrogen peroxide and saline. Scrape and score the skull to increase the bond with the glue. We also detach the neck muscle from the skull in order to reduce pull on the skull and prevent muscle growth that can make the implant less stable. Finally we insert a skull screw on the opposite side of the skull to enhance the stability of the implant.
Craniotomy and Aspiration
Using a stereotax, align the skull and find the location for the implant. Using a drill, make 4 guide holes to outline the lens placement. For CA1, we recommend offsetting the lens 0.5mm to the medial side of the virus injection to prevent imaging any damage induced by the virus injection. Connect the guide holes to create a circular craniotomy and peel off the circular skull fragment. Do not worry about blood as the top layers of cortex will be removed by aspiration. Make absolutely sure that the craniotomy is at least the size of your GRIN lens! Cover with cortex buffer and scrape around the outside of the craniotomy to remove any excess bone or dura.
While keeping a constant flow of cortex buffer use the aspirator to slowly remove the cortex above the hippocampus. Continue removing cortex until you reach the white striations of the corpus callosum. Very slowly and carefully remove the horizontal white striations of the corpus callosum until you reach the striations that go vertical. When you reach these striations, stop aspirating and clean up the sides so that the lens can be placed into the brain. Continue washing with cortex buffer until all bleeding stops and keep the brain constantly flushed with cortex buffer.
Lens implantation
Attach GRIN lens to lens holder on stereotax. Align the lens with the top of the skull at the most posterior part of the craniotomy and quickly insert the lens 1.35 mm below the top of the skull. Remove any excess liquid with the aspirator. Connect the outside of the GRIN lens with the skull and skull screw using cyanoacrylate glue and let fully dry or use a glue accelerator. Remove the lens holder by simply removing the vacuum suction (you can just pinch the tubing) and withdrawing the holder. Next, cover the entire skull with cyanoacrylate glue, and then cover with dental cement. Let dry completely and cover with Kwik-Sil to protect the lens. Remove from stereotax and allow the animal to recover. Give the animal amoxicillin (or equivalent) for 7 days, and daily injections of carprofen and dexamethasone for 7 days.
Important tips to remember
- Try to keep the surgery as sterile as possible. Infections will destroy imaging and the ability to keep the same cells over many days.
- Try to keep isoflurane as low as possible. Surgeries can take 2-6 hours depending on experience.
- Aspirations will take a lot of practice. Go slow at first.
- Depth will be trial and error. If the first few animals don't give good images, check the depth using histology and adjust accordingly.
Please feel free to add any tips that you have!
Baseplating Protocol
Basic Equipment needed
You will only need basic surgical equipment to baseplate. This includes a mouse stereotax, an isoflurane vaporizer, surgical heat pad, stereo surgical microscope, light source, and a dental drill.
You will also need cyanoacrylate glue, fine forceps, double distilled water, lens paper, and dental cement
Baseplate Preparation
Before affixing the baseplate on an animal, you will need to prepare the baseplate. The first step is to insert magnets into the appropriate holes on the baseplate. To ensure that the polarity of the magnets is correct throughout the baseplate preparation, use a reference Miniscope to hold onto the magnets. Mark the top magnet with a sharpie, as seen in the picture to the right. Next, put the top magnet on the head of a screwdriver with the marked side facing away from the screwdriver. Apply cyanoacrylate glue on the edge of the magnet, then push the magnet through the appropriate hole. Ensure that the magnet goes through the hole completely and the top side of the baseplate is flat, as the quality of imaging relies on the Miniscope sitting flush on the baseplate. Repeat this procedure for the next 2 magnets. Finally, put a coat of cyanoacrylate glue on the bottom side of the baseplate and leave the baseplate to dry. Once the baseplate has dried, score the bottom and the sides of the baseplate using a dental drill to allow the dental glue to adhere the baseplate and skull well.
Cap Preparation
Similar to the baseplate preparation, use a reference Miniscope to hold onto the magnets. Mark the top magnet with a sharpie, and put the magnet on the head of a screwdriver with the marked side facing toward the screwdriver. Coat the magnet with cyanoacrylate glue and push the magnet into the appropriate hole. Repeat for the remaining two magnets.
Baseplating
Connect a Miniscope to a DAQ and initialize the Miniscope software on a computer. Attach your prepared baseplate onto the bottom of the Miniscope using a set screw.
Using a stereotax and isoflurane vaporizer, anesthetize the animal and fix ear bars until the animal is stable. Carefully remove the Kwik-Sil off the top of the animal’s GRIN lens with blunt forceps being sure not to scratch the lens. Under a stereo surgical microscope, check to see if there is debris on the top of the GRIN lens. If there is, dampen a sheet of lens paper using double distilled water. Wipe the top of the GRIN lens using fine forceps and lens paper, being sure to only wipe laterally and not to apply direct downward pressure.
After the top of the GRIN lens is clean, explore the field of view with the Miniscope. Adjust the LED brightness and focus accordingly. We advise that you use maximum gain and low LED excitation as to not photobleach the brain during baseplating. After finding your ideal view, practice taking the Miniscope off and on and finding the same view.
When you feel comfortable repeatedly finding the view with the Miniscope, apply dental cement in a “C” pattern around the GRIN lens, making sure not to touch the lens itself. It will be easier if your first application of dental cement is more viscous. Put the Miniscope on top of the lens and find your ideal view. Hold the Miniscope steadily as the first application of dental cement dries, making sure that your view does not change. After the first application of dental cement dries, mix more dental cement and apply it on the posterior edge of the baseplate, making sure it seals to the skull. At this point, you can also build up dental cement along the wall of the baseplate on the animal’s right side. Be sure to avoid applying dental cement onto the camera itself and adhering it to the baseplate. Once the dental cement dries and you feel confident that the baseplate will no longer shift, carefully remove the Miniscope from the baseplate by unscrewing the set screw and lifting it off.
Apply dental cement to the anterior edge of the baseplate and fill in the gaps between the baseplate and skull on the animal’s left side. Allow the dental cement to dry and attach the plastic cap onto the top of the baseplate with a set screw.
